

Good decisions.
Better merchandise.
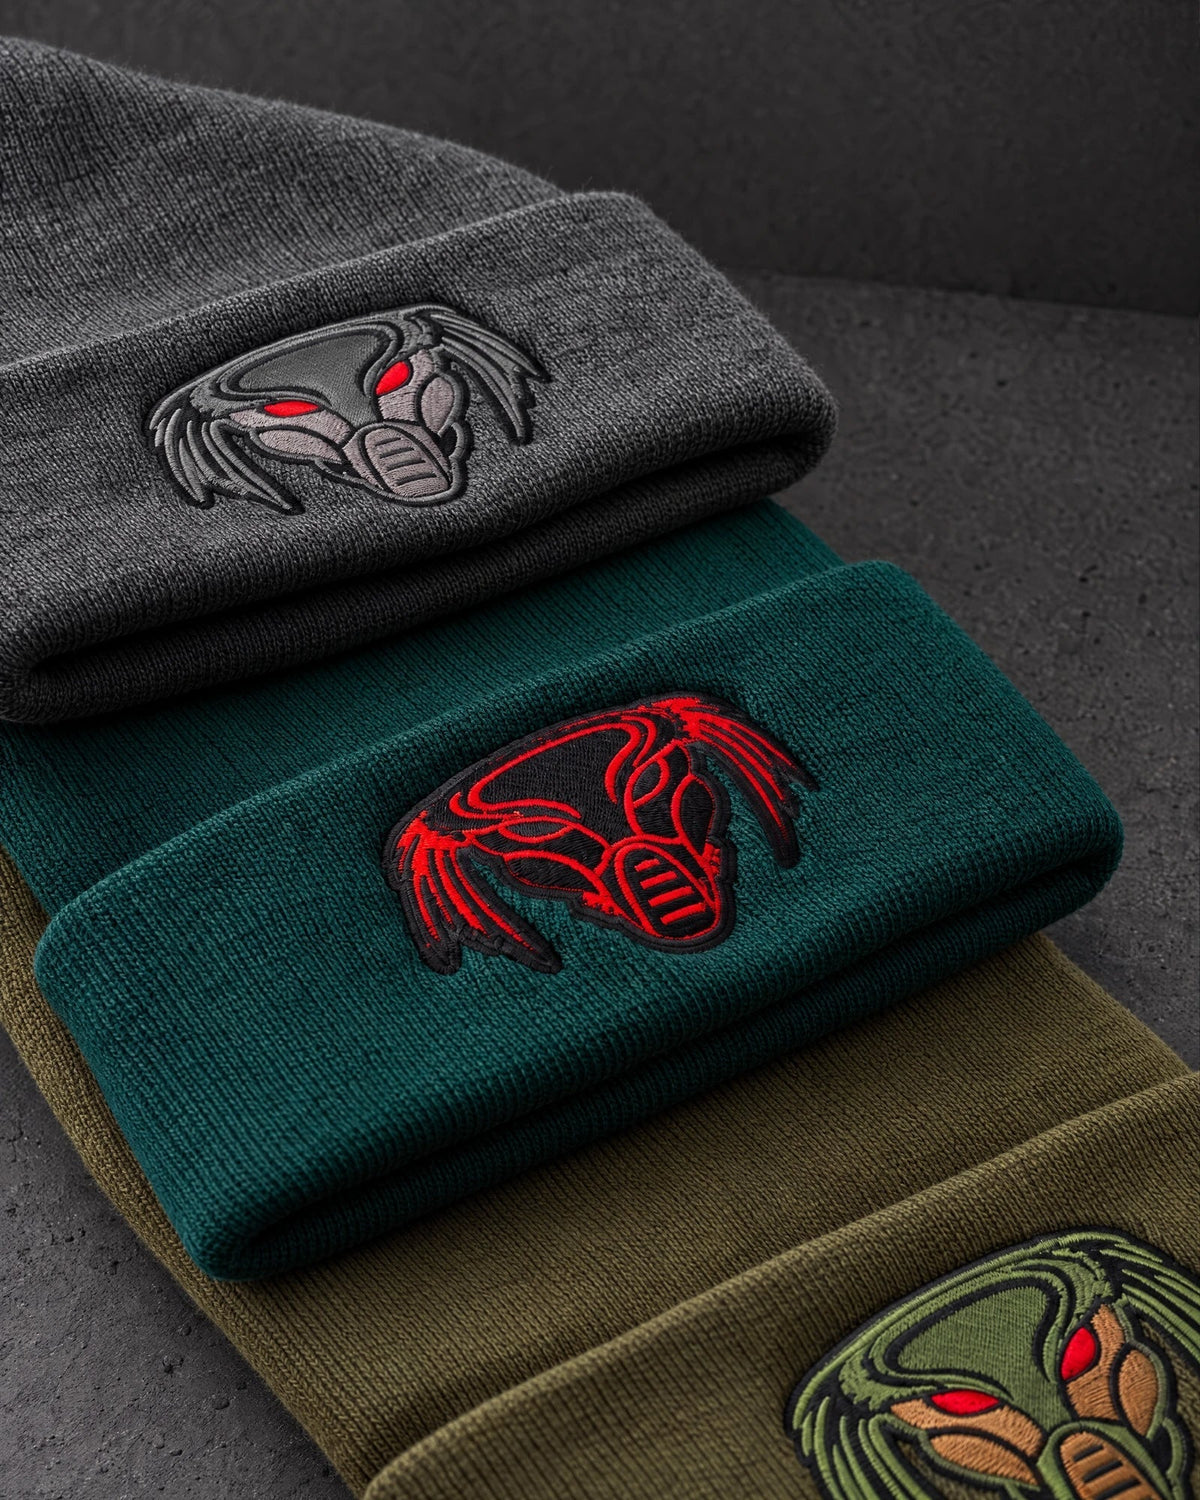
A good embroidered beanie starts with three decisions made together: the beanie, the logo and the thread colours. The cuff gives your design a compact home, so the job is to make the mark recognisable without crowding it. This guide takes you from an original logo file to a useful order brief, with practical checks for colour, scale, placement and approval.
If you already know the style you want, compare the Budget Embroidered Cuffed Beanies and Mid Range Embroidered Cuffed Beanies. If you are still deciding, start with the intended wearer and the result you want them to see.
Start with the person who will wear it
A staff beanie, a clothing-brand accessory and a club fundraiser can use the same logo but need different decisions. Staff clothing may need to sit comfortably beside an existing uniform. A retail accessory may need a quieter mark that customers will wear with their own clothes. A club order may prioritise a recognisable badge and a colour that already belongs to the team.
Write down the main purpose before choosing a design. “Thirty beanies for an outdoor event crew” is more useful than “some winter merch”. It tells you to think about who receives each item, whether the colour should match other clothing and when everything must arrive. It also keeps the order focused: a small cuff does not need to carry every message about the business.
For a first retail run, decide how the beanie fits into the range. Is it the easy accessory that accompanies a T-shirt, or a statement piece in its own right? That choice can guide the base colour and the prominence of the embroidery. Avoid adding another colour simply because it is available; each option should have a reason and a planned quantity.
Choose the beanie before finalising the logo size
The blank is part of the finished design. Its knit, cuff shape and available colours affect how the embroidered mark feels. Compare the actual products rather than treating “embroidered beanie” as one universal specification. The beanie collection is the starting point for seeing the range together, while each product page explains its own ordering options.
| Decision | Budget BC045 | Mid Range BB830N |
|---|---|---|
| Listed construction | Acrylic knit with a folded cuff | Heavyweight cuffed style with organic cotton content |
| Useful starting point | A smaller staff, club or merch order where the budget matters | A range where the garment feel is part of the product decision |
| Where to check | Budget beanie specifications and colour options | Mid-range beanie specifications and colour options |
Both current product pages list a minimum order of ten, but they list different production ranges after artwork approval. Read the range for the style you are buying and confirm your required arrival date before ordering. Choosing the more expensive blank does not automatically make every logo easier to reproduce; artwork and placement still need their own review.

Decide what the logo needs to communicate first
A full brand lockup may include an emblem, a name, a founding date and a strapline. On a folded cuff, those elements compete for limited space. Choose the part that should be recognised first. For an established brand, that may be its symbol. For a new business, the name may matter more because the audience does not yet know the symbol on its own.
Keep a complete master logo and create a considered version for the beanie if needed. That might mean removing a small strapline, shortening a decorative border or using the mark without a secondary line. The aim is to preserve the identity while adapting the level of detail. Do not redraw the logo casually or change its proportions simply to fill the available area.
If another line is essential, include it in the artwork review and explain why. A phone number needed on workwear is a different requirement from a slogan added for decoration. You may find that the supporting information works better on a garment, packaging insert or gloss vinyl die cut sticker, where it can have more room.

Check lettering and detail at the intended finished size
Zooming in on a logo makes almost every detail look convincing. The useful check is the opposite: view it at the dimensions you hope to use on the beanie. A paper printout at actual size can help you judge the hierarchy. It does not simulate thread, but it can reveal that the smaller lettering is already difficult to read before embroidery is considered.
Look at the spaces inside letters, the gaps between shapes and any fine outlines. Ask which details genuinely support recognition. If a thin decorative line disappears, the logo may still work without it. If the brand name disappears, the design needs a more substantial change. This is why there is no single universal logo width that suits every beanie and every artwork file.
Embroidery builds a design with stitches rather than printed pixels. Fine gradients, photographic shading and tightly packed lettering therefore need process-specific advice. Send your original artwork and describe the desired effect. The embroidery service page explains the route for broader garment orders, and the team can review the proposed placement against the chosen item.
Choose thread and beanie colours in the same conversation
First decide whether the branding should be obvious or restrained. A contrast-led combination gives the mark a clearer difference from the cuff. A tonal combination keeps colours closer together so the texture contributes more of the visual interest. Neither direction is automatically better: the right one depends on what the product is for and what the customer should notice.
Check the logo against every base colour in your order. A dark outline may read well on a light cuff and disappear on a dark one. If the artwork includes several colours, check the smaller details as well as the main shape. A design can have strong overall contrast while one important letter or border becomes difficult to see.
Provide brand colour references when you have them, but do not assume that a screen colour is a literal thread specification. Screens emit light; thread reflects it and has a physical texture. Ask how the available thread options relate to the result you want, especially where an exact match is central to the brand. Describe any acceptable flexibility before approval.

Give a tonal logo enough structure to work
“Black on black” describes an intention, not a complete production instruction. You might mean black thread on a black beanie, charcoal thread that is slightly lighter, or a compact mark with a very quiet overall impression. Include a reference and explain which feature you like: the colour difference, the texture or the scale of the placement.
A low-contrast logo asks more of its outline and lettering. Consider a stronger silhouette, fewer internal details and enough separation between letters. A subtle mark that remains recognisable is more useful than an elaborate design that becomes a dark patch. Check the design in a normal viewing context rather than judging only an enlarged mockup under bright light.
If you are planning tonal clothing alongside the beanies, confirm each item separately. Embroidery and screen printing create different surfaces, so the same colour reference will not necessarily look identical across them. Our screen printing service is the relevant starting point for a printed garment brief. The beanie brief should still identify the thread effect and cuff placement.
Describe placement with a reference and dimensions
“Logo on the front” is a useful first instruction, but a visual reference makes it clearer. Show the mark centred on the folded cuff and include approximate width and height. Treat those dimensions as a proposal for review, rather than a guarantee that any file can be stitched at that size on any blank.
Consider how the beanie is worn. The folded cuff defines the visible branding area, so avoid a mockup that places the logo partly across the fold or into a section that would disappear when worn. A design that looks balanced on a flat product photograph may need another check against the intended cuff shape and proportions.
Send one placement reference per design version. If you want different embroidery on different colourways, make that explicit. A list of garment colours does not itself tell the team to change thread colours, artwork size or placement. Clear naming prevents one approved version from being confused with another.
Build a colour split that is easy to order and check
Choose the total quantity first, then allocate it across the available colours. For a staff order, an actual list of recipients is more dependable than guessing which colours will be popular. For a retail test, begin with a manageable range and record what sells before expanding. Several barely stocked colours can be harder to manage than two deliberate choices.
A fictional example might be twenty beanies split between twelve black and eight of another available colour, using the same approved logo placement. If the thread combination changes between those colours, the brief should include both combinations. This is an ordering illustration, not a claim that every colour or design split has the same price or availability.
Check what the purchase quantity represents. A full product configuration may use an item quantity and colour allocation, while a social-shop complete-pack product describes a fixed pack. Read the actual title and included quantity. One pack is not necessarily one beanie, and ordering two packs is not the same as requesting two individual hats.

Send useful artwork, not just a screenshot
Find the original logo file if possible. Vector artwork is a helpful source for reviewing shapes and proportions; the product pages list accepted file types. A screenshot of a website, a social avatar or an embroidered sample can explain the look you want, but it is a weaker starting point for understanding the design itself.
Keep the production artwork and the placement mockup separate. Name files clearly, for example “brand-symbol-final” and “beanie-front-placement”. If there are two approved versions, label their intended use rather than sending a folder of exports with names such as “final-new-final”. Include the preferred dimensions and tell the team which features must be retained.
Do not assume that a sharp-looking PDF automatically contains vector artwork; it can also contain a small bitmap image. The useful question is whether the supplied design has enough information for the intended result. If you are uncertain, send the best original file you have and ask for a check before treating the artwork as production-ready.
Use the proof as a decision point
When the proof arrives, compare it with the complete brief rather than checking only whether the logo is present. Review the selected beanie, the garment colour, the artwork version, thread colours, proposed dimensions and position. Look for missing letters, unintended backgrounds, spelling changes and small details that may no longer contribute.
A digital proof communicates the planned design and placement. It should not be treated as a physical sample of texture or a promise that every screen displays colour identically. If a particular stitch detail or exact finish is critical, discuss that before approval and ask what further confirmation is appropriate for the order.
Send feedback as one clear set of changes. “Use the simpler symbol, keep the proposed width and change the light outline to the agreed thread option” is easier to act on than several separate messages that contradict each other. Once the revised proof meets the brief, make sure the approval refers to the correct version.
Plan the arrival date backwards
Start with the date the beanies must be in your hands, then allow for artwork review, approval, production and delivery. The current budget and mid-range product pages have different production timings, so use the chosen product's information rather than borrowing a turnaround from another item in the range.
If the order is for an event, include the event date and any earlier date needed for packing or distribution. Production time after approval is not the same as total time from the first enquiry. A late logo revision can change when the order is ready to proceed, even if the initial enquiry was sent well in advance.
For a mixed merch order, review every product's timing. Adding custom keyrings or stickers does not make their production schedule identical to the beanies. Tell Project Print whether the full set must arrive together, then confirm the practical plan before promising a launch date to customers.
Your embroidered beanie brief checklist
- The beanie style and product reference.
- Total quantity, with the garment-colour split written out.
- The original artwork and clearly named final version.
- A placement mockup with proposed width and height.
- Thread colour references and the intended contrast or tonal effect.
- Any separate artwork or thread combinations for different colourways.
- The required arrival date and what the beanies will be used for.
- Any finish detail that must be checked before approval.
Keep a copy of the final specification and approval for a future reorder. A previous order gives useful context, but a new blank, new colour or different artwork size still needs confirmation. Recording what worked also makes it easier to judge whether to repeat the same range or introduce a considered second option.
Ready to put your logo in thread?
Explore the embroidered beanie range, compare the budget cuffed beanie with the mid-range cuffed beanie, then send the artwork, quantity and deadline together. If the beanies are part of a wider clothing order, include that in your Project Print enquiry so each item and placement can be considered as part of the same brief.


